October 25, 2013

Corsets and Etsy shops!

 I'm still plugging away at my natural form gown over the last few weeks but my attention has been diverted to a couple of other things that I have been working on.


Using a pattern I developed for myself I have been experimenting with grading up a corset pattern into something resembling standard sizes, or what I'm using as standard sizes away! I would like to be able to offer something a little less expensive than a fully custom corset to my customers.

I started with just making it an under-bust pattern as to me it's the bust that is usually the hardest to fit and make into something standardised. I love full, rounded hips on my corsets and so this pattern incorporates that. It is fully boned with an average of 24 steels to give a really smooth fit. I was really pleased with the results! Everyone I have tried the samples on, in a range of sizes and body types, have looked fab and it's fitted them really well! To complement my facebook page I have now opened an Etsy shop and listed the under-busts and hope to add to them soon. I already have an over-bust corset in development so will list that as soon as I am happy with the fit.

I also think I'm going to have to make a TARDIS corset for all the Doctor Who fans out there (including me!), I was recently at the London Comic Con and loved the outfits I saw there! When I get round to making a sample I'll list that on Etsy too :)

Last night I did finally get around to making all the buttonholes to attach the train onto my petticoat, and I have to say I LOVE the petticoat! Possibly even more than the skirt, which is also done. There's something about those white ruffles and lace that just gets me :)

I'll update soon with pics of the skirt and petticoat!

September 23, 2013

Natural Form Petticoat


The "Natural Form" period ranged in the few years from 1877-1882 where the fashionable silhouette shrank from the voluminous early bustle era to something more resembling the natural figure. This was short lived as soon the bustle came back, and then some, with shelf-like structures with elaborate drapery and poufs ballooning behind women.


May 1880 Journal des Demoiselle

As the bustle frame shrank, the new style revealed more of the sinuous shapes of a woman's hips and legs than had been seen in decades. Princess lines and cuirass bodices which were long and smooth- fitting were all the rage The term "natural form" was a bit of a misnomer of course, the skirts were restrictive, tied around the legs to maintain the narrow look, and frequently still had some form of support particularly behind the knees, where the skirt was allowed to billow out, and to help the train keep it's shape.


My inspiration fashion plate


I wanted to make an outfit that fell in the earlier part of the Natural Form era, where the skirts were not quite so narrow and the bustled effect of some fullness behind hadn't quite disappeared while also having a slim, narrow front.

 To get this effect I needed to make a petticoat to support my skirt in this way. I used the Truly Victorian petticoat pattern TV125.


This, like all Truly Victorian patterns, is a very easy to follow and successful pattern. It includes two ruffles on the hem and an optional button-on train.


 I used some cotton lace to cover the raw edge of the ruffles.


To get the required pouf in the back there is a layer of netting sandwiched between an inner and an outer back piece. I say a layer, I mean tiers of gathered netting all sewn together. Netting is not my favourite thing to sew!


Struggling to get this through the sewing machine can be a little like trying to put on a pair of jodphurs in a moving car (incredibly awkward)! Plus I kept on adding in extra pieces, as for some reason I would run out of the piece I was adding to the bottom of the last one before reaching the end.
 The end result is then sandwiched in between the inner and outer back pieces and it's all sewn down the edges.

I wasn't sure how happy I was with the poufiness of the result. I had added in extra to the bottom two tiers so they looked aright but the rest of it looked a little sad and forlorn so I decided to go back and add in a few more layers to the top and middle region.


Much better!


The end result! The button-on train is still to be done but I'm very happy with the shape of the petticoat. I'm glad I put in the extra tulle as my skirt is likely to squash it down a little bit more.


September 07, 2013

Blog Relaunch!

It's been a long time since I have posted here but I've decided to try and document my work again at least semi-regularly.

A lot has happened in the last two years, commissions have been taken and many outfits and corsets made for myself and others. I have been running regular classes in corset making and even started a historical costume meetup group!
Check us out: http://www.meetup.com/The-Irish-Historical-Costumers-Meetup-Group/

With so much to catch up on I think I will be just plunging straight into what I am currently making and planning and will slowly catch up in between on past projects along with the odd gratuitous cat picture!

So without further ado....

The Natural Form Mink Silk Gown

I have been in love with the natural form silhouette for years and I'm now finally getting around to making such an outfit. I have 12 metres of silk earmarked for a recreation of this fashion plate.


The colour of the silk was rather suspiciously called "mink" though it is more a funny kind of pinky/creamy/salmony colour. Not sure what colour I would pair with it. I either love it or hate it depending on what light I look at it in but I think for this outfit it will look rather elegant! Plus it was on sale!

Slightly odd coloured silk..

As always when starting a new period the underpinnings come first. I am using the revised Natural Form Petticoat pattern from the excellent Truly Victorian and then modifying the Fantail Skirt pattern and 1880 Jacket pattern for the rest. The over skirt I will drape myself.

Have only got as far as cutting out the petticoat but might now take a leaf out of Tiger's book and curl up in front of the first fire of the season...


September 25, 2011

Photoshoot fun!

A few months ago I was contacted by a local photographer. She wanted to organise a photoshoot for her portfolio and wondered if I was interested in being involved. We had two very talented girls doing hair and makeup, two other models, myself and all my corsets and clothing and a great studio. Everyone was doing it for free for each others mutual benefit and portfolios. I had wanted some good photos of my work so it was a fabulous opportunity! Not to mention it was great to get some nice photos of myself  :)

The hair and make up was just fabulous! So artistic and fun! Here are some pics of the process..


When they started doing my hair I didn't know what it looked like, all I knew was that there appeared to be a lot of chickens going up onto my head! They stuck feathers to my eyelashes and my eyebrows and all sorts of things, I was a little worried! But I think it all turned out fabulously! Will post the pictures from the actual shoot tomorrow.

September 24, 2011

Adventures in Leather

I had hoped to document the making of the first leather corset commission in detail but my camera stopped cooperating half way through! So here is a really quick overview and some pics of the finished corset.

This was my first foray into working with leather and it certainly was a learning curve. It felt like I had to rethink every step! When I got to doing the boning channels and stitching through a billion layers of leather and coutil I began to seriously worry for the health of my machine. I ended up doing the thickest seams on a friends industrial machine but the challenges didnt stop there. Anyway, lots of swearing later, with the help of binder clips, lots of tea and the growing callouses on my fingers we had a corset that I was pretty pleased with!


The stitching is in purple contrast thread with flossing at the end of the bones and purple cotton lining.

Main lessons learned:
- Yes it's obvious but a proper leather needle makes all the difference! (I had been worried about the cutting edge weakening the coutil layer)
- You can pin, just keep them in the seam lines and there will be no big holes left in your corset
- A walking foot will save you san points
- An industrial machine is really needed to make these in future if Im not to waste time worrying or getting a cramp in my hand from using the hand crank
- Even though I'm vegetarian ...there's just something about real leather!

August 07, 2011

Currently on the table..

I originally started this blog for the Your Wardrobe Unlockd double pattern project competition, I didn't really intend to go on with it. I'm thinking however that I might try to update with some of the current projects I'm working on for anyone that may or may not be interested and for my own sake, to keep me moving on things!

Currently I have two commissions on the go, hopefully to get done by the start and end of September.
The first is for a black leather victorian corset with some pretty purple stitching detail. I've fitted one or two mockups so far and am happy with how it's coming along.

The second corset is also in leather but a little more detailed. We're including straps and buckles, a halterneck strap and some equestrian metalware! It'll be the first time I've made something with these details so I'll be doing a little figuring out as I go along but I'm doing my research and hoping it'll turn out well!

The third project is a white silk version of the blue Georgian stays I made for the competition. This is going to be for a local bridal boutique. There will be some modifications, I won't be using reed, I'll probably use artifical whalebone as that much steel would be really heavy but will be doing some experiments first as I'm not sure how much support it will give. A good friend who does *amazing* embroidery is going to be offering her services should a bride want that but this one will be plain. I really need it to be finished by the end of the month if possible so I have plenty to be doing!

I'll try and update regularly as I go along with these three projects and anything else that crops up! Meanwhile seeing as I don't have any interesting pics to share yet, I'll leave you with a taster of a post I'll be doing on a photoshoot I had recently of my clothing and corsets!


February 13, 2011

DPP challenge

So when I saw that my two favourite periods were being covered in the DPP competition this year I was so excited! I had grand plans of full natural form outfits and possibly a pair of stays or two. Unfortunately due to time and money my plans were slimmed down and slimmed down again until I was left with making a pair of stays only and in true form I left myself only a few weeks to do it!

I thought I'd try and document some of the process as I went. I was using a couple of new techniques including my first bit of proper embroidery and using reed as boning. I had made one pair before for a friend that was boned only with steel and it weighed a tonne!

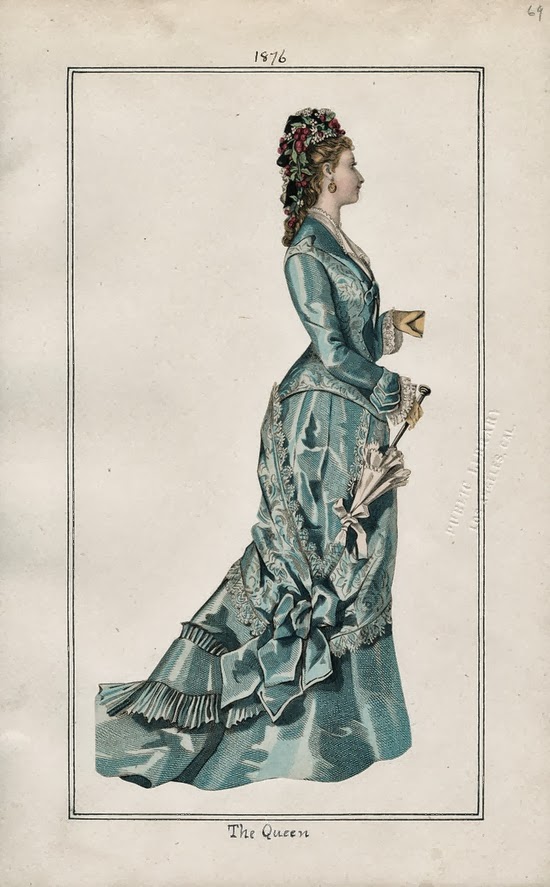
Originally I was inspired by these images I found on the web:


As you will see I ended up going for something completely different but I liked the idea of emphasising the front panel shape.

I enlarged the pattern in the Corsets and Crinolines book for the 1780s stays and adjusted it to my measurements.

After making a mock up I raised the top line, lengthened the waist, and made a few other adjustments. I also experimented with how to pattern the boning and whether to use one or two reeds in each channel.

I decided on the fan type pattern of boning and only one reed in each channel. It seemed strong enough. I was pretty pleased with how the second mock up turned out.  It was at this point I started to wonder how wise I was to use reed! I wanted the traditional material but I was never going to be able to clean this and was a bit worried about breakage! Maybe I should be using artifical whalebone?? What if after all that binding of tabs (this was a previous painful experience!) I would have to undo it to replace the boning! At this point though I had the reed and didnt have time to order anything else so I decided to just plough ahead with what I had.

Now I had to tackle the embroidery. Having only ever done a bit of flossing on the ends of bones I was a little worried! Here was my first practise at satin stitch and couching.


Then I cut out the front panel ready for embroidering. I used a little fray check on all the edges particularly as I was going to be handling this piece a lot with the embellishment.


I played around with the pattern of the design for ages before getting something approaching what I wanted. I didn't anticpate it being so hard to draw a few wavy lines and some tear drops! Eventually I came up with this.


Then I had to work out how to transfer the design. I decided that poking holes with my awl and using a
pencil to mark it through to the silk would be my best option. Would use the holes for the stems and the flowers I would draw free hand onto the panel.


This seemed to work pretty well! Now for the scary part of actually doing the embroidery. I have to say I found I quite enjoyed this!


Once I had done that on one side I simply reversed the stencil to get a mirror image on the other side and this is what I ended up with.

Now using the silk layer cut outs that I already had as a guide for the other layers, I stacked the two layers of coutil underneath it and pinned and then basted the layers together before cutting out. I had previously interfaced the silk as well.


Once I had the layered panels cut out I made the channels for the reed. With previous experiments I determined I wanted a channel that was about 9mm wide. I played around with the pattern on paper before carefully marking out with chalk and sewing the channels.


Once all that was done I assembled the panels together. I admit now that I didn't do this the traditional way and instead machine sewed the seam allowences together carefully making sure that the channels at the seam allowences were not caught by accident.


Before I could sew the horizontal channels at the top I had to put in the reed. This was much easier than I thought. I just cut them to size and gave them a brief sanding to take off any rough bits and slid them in. I had experimented with using the curve of the reed, as it came in a circular bundle, for the front panel to help shape it but found that it made the bottom stick out so I steam ironed most of the length of the reed just leaving the top to curve outwards to help the shape of the top of the stays. The pic below is before it is boned.


Once I had the vertical bones in I used a zipper foot to sew the first line of stitching for the horizontal channels and then a regular foot for the rest and slid in the reeds, which I left unironed to help with the shape.

I also attached the straps at this point. You'll notice that my pics of the process start to majorly fall off about now! This is because I suddenly realised I had about two days to finish everything before the deadline and didn't stop for anything! I cut out the pattern again in an Irish linen and sewed it together before laying it into the stays. I tacked it all together and then at the centre back turned the seams in and topstitched them down.

Now I could put in eyelets for the spiral lacing and acutally try it on!!


Then came the bit I had been dreading..all that binding! Surprisingly it wasn't quite as painful as it had seemed before! The bottom edge did take about 6 hours but I was happy with it at the end and even had time for my little photoshoot before getting my entry in with about 5 hrs to spare!


This is actually a piece I'm really proud of! If I was to do anything different I would have cut down under the arms a bit as it sticks into me there slightly and I think double stitching or reinforcing the seams might have been a good idea! But on the whole I was very happy! I'm even thinking of making another pair in plain white linen with artificial whalebone to use as a more practical 'working' pair.

I've had all sorts of problems uploading photos to this blogger so I've the left the proper photos for the entry. Learning how to photograph them was a lesson itself! But on the whole I think it went pretty well and I managed to avoid staying up 'til 3am three days in a row this time! Yeay! I hope you like them! :)